
Creating your first Facebook ad doesn't have to be overwhelming. With the right setup and a clear process, you can launch a campaign that reaches your target audience and drives real results.
This step-by-step guide walks you through everything from setting up your accounts to publishing your first ad and monitoring performance.
Account Setup
Before creating ads, you need the proper account structure in place.
Step 1: Create a Facebook Business Account
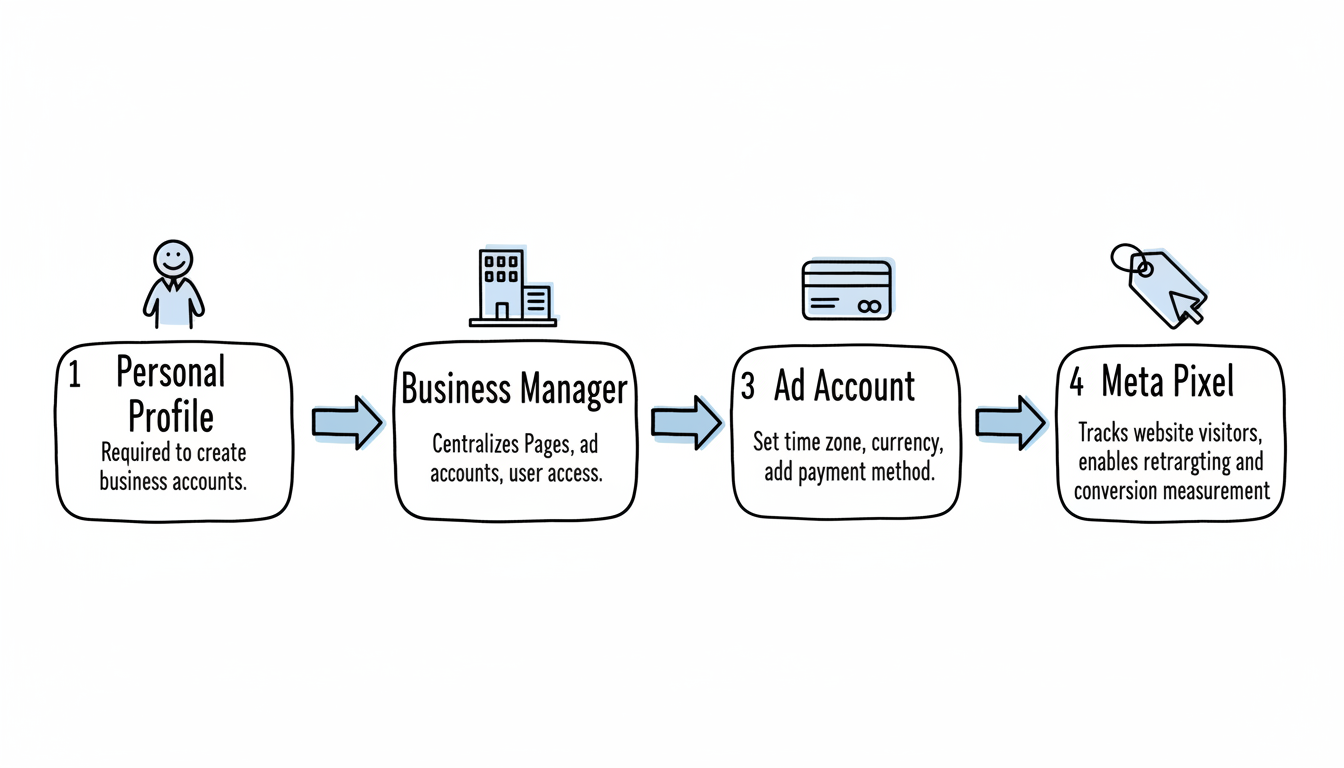
Start with Meta Business Manager, which centralizes control over your Pages, ad accounts, and user access.
What you need:
- A personal Facebook profile (required to create business accounts)
- Your business information (name, address, email)
- A Facebook Business Page for your company
Setup process:
- Go to business.facebook.com
- Click "Create Account"
- Enter your business name and email
- Connect or create your Facebook Business Page
- Complete verification steps
Step 2: Create an Ad Account
Within Business Manager, create your Facebook Ad Account:
- Navigate to Business Settings
- Click "Ad Accounts" under Accounts
- Select "Create a New Ad Account"
- Enter your account name
- Choose the correct time zone and currency - these are difficult to change later
- Add a payment method
Step 3: Install the Meta Pixel
The Meta Pixel tracks visitor actions on your website and is essential for measuring ad performance.
Basic installation:
- Go to Events Manager in Business Manager
- Click "Connect Data Sources" to "Web"
- Select "Meta Pixel"
- Name your pixel and enter your website URL
- Add the pixel code to your website header (or use a partner integration)
This tracking enables retargeting, conversion optimization, and accurate reporting.
Creating Your First Ad
Now you're ready to build your first campaign in Ads Manager.
Access Ads Manager
From Business Manager:
- Click the menu icon (three lines)
- Select "All Tools"
- Click "Ads Manager"
- Navigate to the "Campaigns" tab
Choose Your Campaign Objective
Meta organizes objectives into three categories. Select the one that matches your goal. Understanding Facebook ads objectives is crucial for campaign success.
Category | Objectives | Best For |
Awareness | Brand awareness, Reach | New brands, product launches |
Traffic | Link clicks, Landing page views | Driving website visitors |
Engagement | Post engagement, Video views | Building social proof |
Leads | Lead generation, Messages | Collecting contact information |
Sales | Conversions, Catalog sales | E-commerce, purchases |
Beginner recommendation: Start with "Traffic" or "Leads" for measurable results with simpler setup.
Set Your Budget
Choose between two budget types:
Daily Budget:
- Meta spends up to this amount each day
- Good for ongoing campaigns
- Start with $10-20/day for testing
Lifetime Budget:
- Total amount for the entire campaign duration
- Good for fixed-term promotions
- Useful when you have a set budget
According to Meta ads experts, beginners should start small - even $5-10/day - to test and learn before scaling. If you're wondering about long-term expenses, explore typical Facebook ads cost per month to set realistic expectations.
Create Your Ad Set
The ad set level controls who sees your ads:
Placement options:
- Advantage+ Placements (recommended for beginners): Let Meta automatically place ads across Facebook, Instagram, Messenger, and Audience Network
- Manual Placements: Choose specific placements yourself
For first campaigns, use Advantage+ placements. Meta's algorithm will optimize delivery automatically.
Targeting
Targeting determines your ad's success. Define exactly who should see your ads.
Location Targeting
Specify where your audience lives:
- Country, state, or city
- Radius around a specific address
- Include or exclude locations
Demographic Targeting
Narrow by:
- Age: Select minimum and maximum age range
- Gender: All, men, or women
- Language: Target specific language speakers
Interest and Behavior Targeting
Layer additional targeting based on:
Interests:
- Pages people like
- Topics they engage with
- Related activities and hobbies
Behaviors:
- Purchase behavior
- Device usage
- Travel patterns
Audience Size Recommendations
Avoid targeting "everyone" - a common beginner mistake. Instead:
Audience Size | Strategy |
Too broad (10M+) | Add more targeting layers |
Sweet spot (500K-5M) | Good balance of reach and specificity |
Too narrow (<100K) | Remove some restrictions |
Custom and Lookalike Audiences
Once you have website traffic or customer data:
- Custom Audiences: Target people who visited your website, engaged with your content, or are on your email list
- Lookalike Audiences: Reach new people similar to your best customers
These advanced options become available after gathering initial data.
Going Live
Create Your Ad
At the ad level, build what people actually see:
Choose your format:
- Single Image: Simple, fast to create
- Single Video: Higher engagement potential
- Carousel: Multiple images or videos users swipe through
Write your copy:
Follow these best practices:
- Keep primary text under 125 characters
- Lead with benefits, not features
- Include a clear call-to-action
- Use conversational language
Select your CTA button:
- Learn More
- Shop Now
- Sign Up
- Get Quote
- Contact Us
Match your CTA to your campaign objective.
Review and Publish
Before publishing:
Pre-launch checklist:
- Verify targeting matches your audience
- Confirm budget and schedule are correct
- Check all links work properly
- Review ad preview across placements
- Ensure pixel is active for tracking
Click "Publish" to submit your ad for review. Meta typically approves ads within 24 hours, often much faster.
Monitor Initial Performance
After your ad goes live:
First 24-48 hours:
- Check that the ad is delivering (spending budget)
- Verify conversions are tracking correctly
- Don't make changes yet - let data accumulate
After 3-5 days:
- Review key metrics: CTR, CPC, conversions
- Identify any obvious problems
- Consider adjustments if performance is very poor
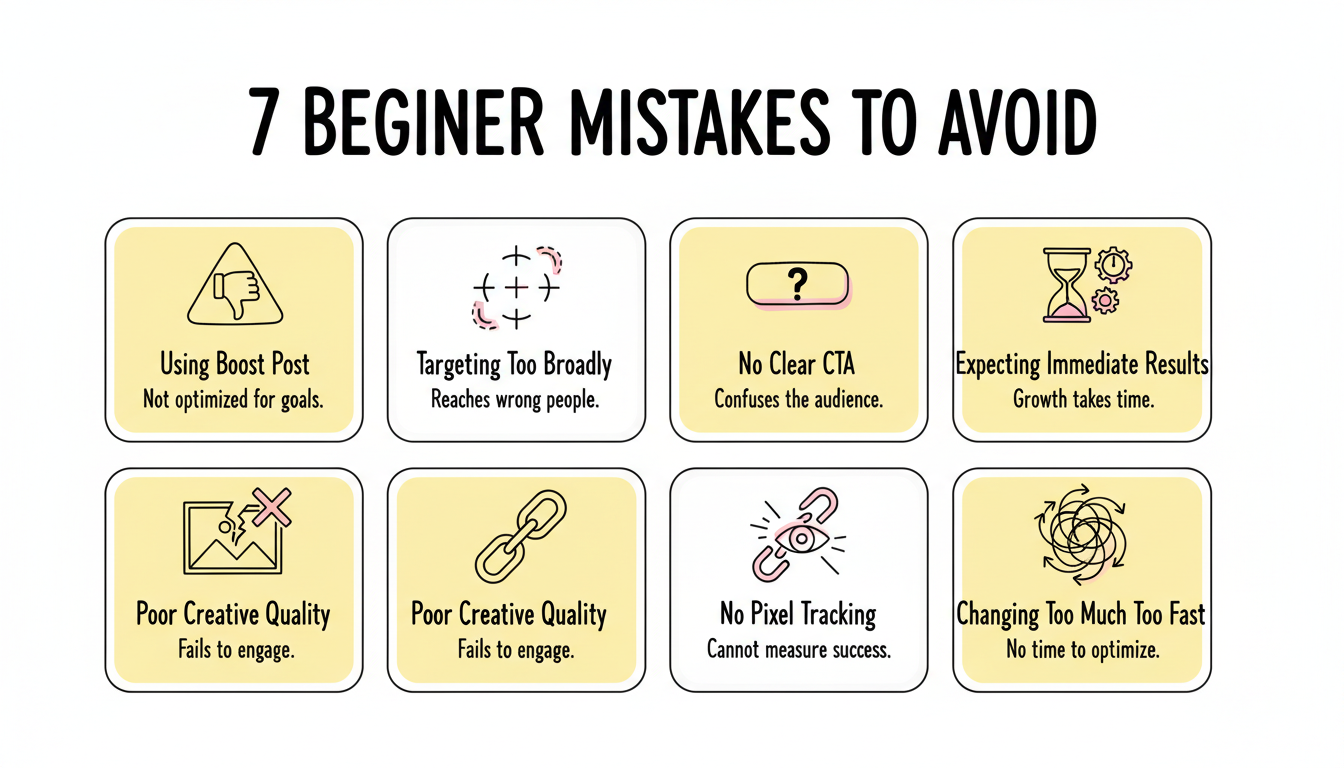
Common Beginner Mistakes to Avoid
Most beginners fail because of these errors:
- Using Boost Post instead of Ads Manager: Boost has limited targeting options. Always use Ads Manager for proper campaigns.
- Targeting too broadly: Trying to reach everyone means reaching no one effectively.
- No clear call-to-action: Tell people exactly what you want them to do.
- Expecting immediate results: Give campaigns 3-7 days to optimize before judging performance. Understanding the average ROI Facebook ads can deliver helps set realistic benchmarks.
- Poor creative quality: Bad visuals and weak copy doom campaigns regardless of targeting.
- No tracking setup: Without the pixel, you can't measure what matters.
- Changing too much too fast: Making multiple changes prevents learning what works.
Writing Ad Copy That Converts
Beginner accounts win or lose on the first line. Lead with the specific outcome the reader wants, not your brand name - "book 3 demos this week" beats "Acme Software, founded in 2021." Speak to one audience per ad so the message stays sharp, and put the offer or proof in the first sentence. Test two or three hooks at once rather than one polished version, because the data, not your taste, should pick the winner. Clear, plain copy consistently outperforms clever copy that makes the reader work to understand the point.
Tracking and Pixel Setup for Beginners
No tracking means no ROI, and beginners skip this most. Install the Meta pixel before you spend a dollar, confirm it fires on the thank-you or purchase event, and set up the Conversions API so browser changes do not blind your data. Define one primary conversion event and let the algorithm learn from clean signal instead of feeding it conflicting goals. Check the Events Manager that purchases are registering within a day of launch - a silent pixel is the difference between optimizing and guessing.
Common Beginner Mistakes That Waste Spend
The expensive beginner errors are predictable. Targeting too broadly so the algorithm spends on the wrong people while it "learns." Changing the campaign daily so it never exits the learning phase. Picking automatic placements without reviewing where the spend lands. And judging a campaign in three days, before frequency and optimization settle. Give each campaign a real learning window, narrow the audience to start, and read performance weekly - patience plus clean tracking beats constant tinkering for a new account finding its footing.
Key Takeaways
- Set up Business Manager, an ad account, and the Meta Pixel before creating ads
- Choose campaign objectives that match your actual business goals
- Start with small daily budgets ($10-20) and Advantage+ placements
- Avoid targeting too broadly - aim for audiences of 500K-5M people
- Use Ads Manager instead of Boost Post for proper targeting options
- Give campaigns 3-7 days to optimize before making significant changes