
The TikTok Pixel is essential for running successful advertising campaigns. Without proper pixel setup, you can't track conversions, build retargeting audiences, or optimize campaigns for the results that matter to your business. According to TikTok advertising experts, installing your pixel during account setup—before launching any ads—ensures you capture valuable data from day one.
This guide walks you through every step of TikTok Pixel installation and configuration.
What Is the TikTok Pixel?
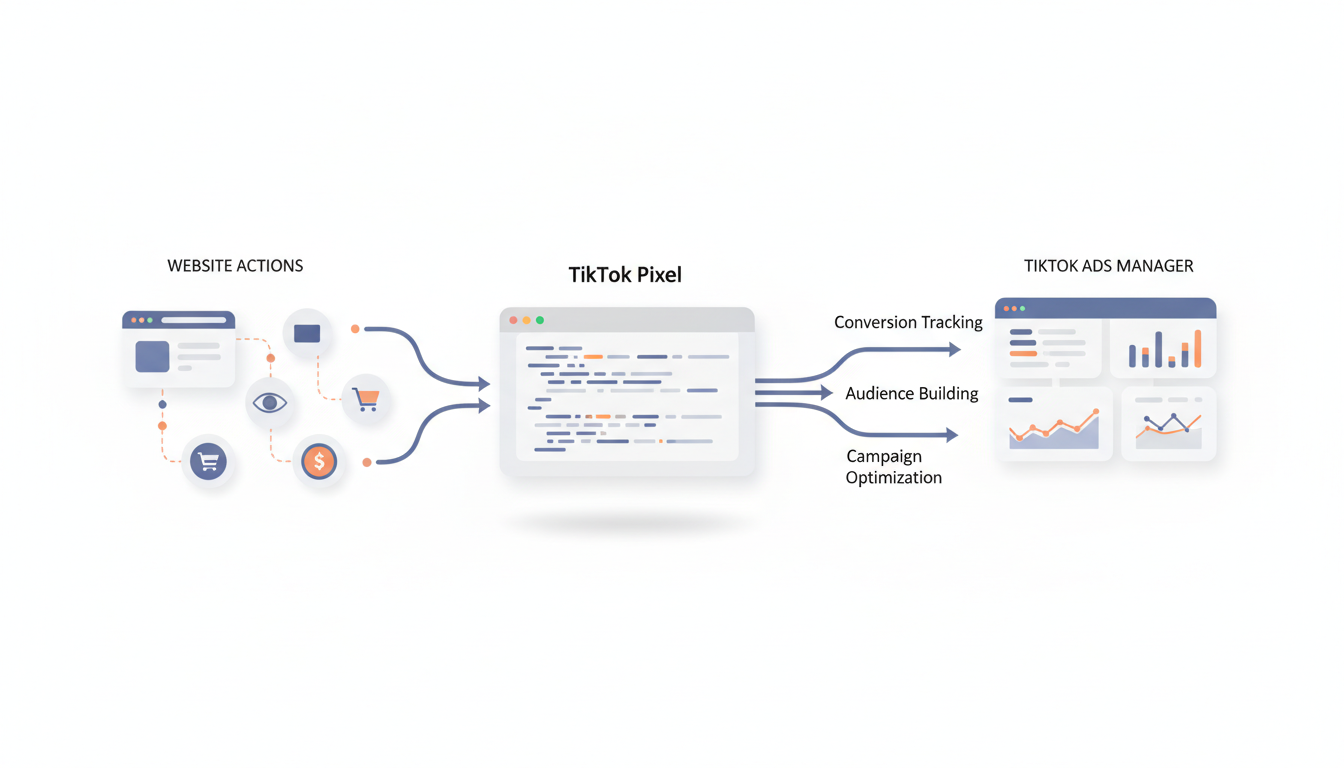
The TikTok Pixel is a piece of JavaScript code that you install on your website. It tracks visitor behavior and sends that data back to TikTok Ads Manager, enabling three critical capabilities:
Conversion Tracking
The pixel records when visitors complete valuable actions:
- Page views
- Product views
- Add to cart
- Checkout initiation
- Purchases
This data shows which ads drive real business results, not just clicks.
Audience Building
Pixel data lets you create custom audiences based on website behavior:
- Retarget visitors who didn't convert
- Create lookalike audiences from purchasers
- Exclude existing customers from acquisition campaigns
Campaign Optimization
When TikTok knows which users convert, its algorithm can find more users like them. Campaigns optimized for "Complete Payment" events outperform those optimized for clicks.
According to ecommerce advertising guides, installing your pixel early—even before running ads—allows you to build audiences and collect optimization data immediately.
Installation Methods
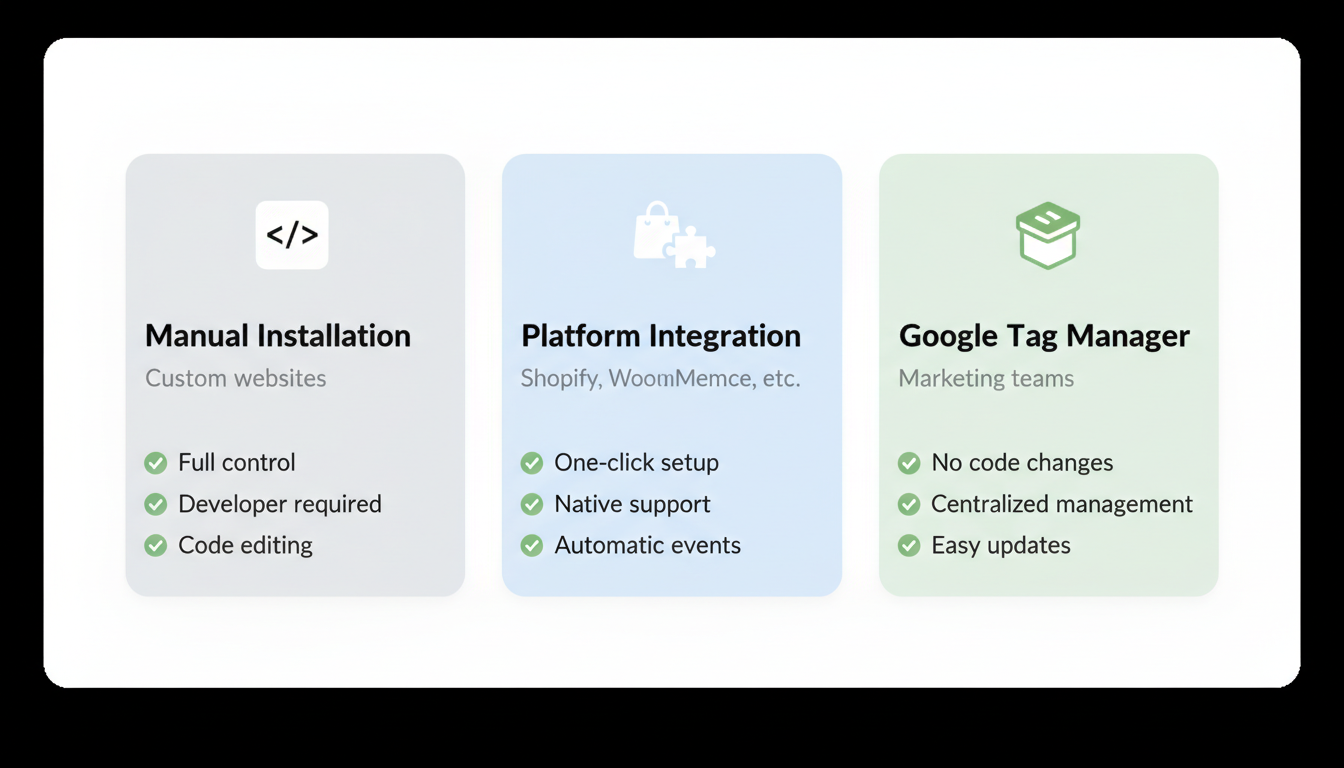
TikTok offers multiple ways to install your pixel depending on your technical setup.
Method 1: Manual Installation
Best for: Custom websites, developers comfortable with code
Step 1: Create Your Pixel
- Log into TikTok Ads Manager
- Navigate to Assets > Events
- Click Manage under Web Events
- Click Set Up Web Events
- Name your pixel and select TikTok Pixel
- Choose Manually Install Pixel Code
Step 2: Install Base Code
Copy the pixel base code and paste it into your website's <head> section, before the closing </head> tag. The base code should appear on every page.
<!-- TikTok Pixel Base Code -->
<script>
!function (w, d, t) {
  w.TikTokAPI = t; var s = d.createElement("script");
  s.type = "text/javascript"; s.async = true;
  s.src = "https://analytics.tiktok.com/i18n/pixel/sdk.js";
  var x = d.getElementsByTagName("script")[0];
  x.parentNode.insertBefore(s, x);
}(window, document, 'ttq');
ttq.load('YOUR_PIXEL_ID');
ttq.page();
</script>
Replace YOUR_PIXEL_ID with your actual pixel ID from TikTok Ads Manager.
Method 2: Platform Integration
Best for: Shopify, WooCommerce, BigCommerce, and other supported platforms
TikTok offers native integrations with major ecommerce platforms:
Platform | Supported Features |
Shopify | Pixel + Events API |
WooCommerce | Pixel + Events API |
BigCommerce | Pixel |
Wix | Pixel + Events API |
Adobe Commerce | Pixel + Events API |
PrestaShop | Pixel + Events API |
Shopify Installation:
- In Shopify Admin, go to Sales Channels
- Add the TikTok channel
- Connect your TikTok Business Account
- Follow prompts to install pixel automatically
- The integration handles base code and standard events
Method 3: Google Tag Manager
Best for: Marketing teams wanting centralized tag management
According to tracking specialists, Google Tag Manager is the recommended approach for most businesses because it eliminates future code changes when adding other platforms. Once the browser pixel is stable, pair it with TikTok Events API setup so server-side conversions backfill the signal browsers block.
GTM Installation Steps:
- In TikTok Ads Manager, get your Pixel ID
- Open Google Tag Manager
- Create a new tag with template: TikTok Pixel
- Enter your Pixel ID
- Set trigger: All Pages
- Publish your container
For event tracking, create additional tags for each conversion action.
Event Setup
The base pixel tracks page views. To track conversions, you need to configure specific events.
Standard Events
TikTok recognizes these standard events for ecommerce:
Event | Trigger | Use Case |
PageView | Page load | Audience building |
ViewContent | Product page view | Retargeting |
AddToCart | Cart addition | High-intent audiences |
InitiateCheckout | Checkout start | Cart abandonment |
AddPaymentInfo | Payment details entered | Late-funnel retargeting |
CompletePayment | Purchase complete | Conversion optimization |
Search | Site search | Intent signals |
Setting Up Events
Manual Event Code:
Add event code after the base pixel code, triggered by the appropriate user action:
// Track product view
ttq.track('ViewContent', {
  content_type: 'product',
  content_id: 'SKU123',
  content_name: 'Product Name',
  value: 29.99,
  currency: 'USD'
});

// Track purchase
ttq.track('CompletePayment', {
  content_type: 'product',
  content_id: 'SKU123',
  value: 29.99,
  currency: 'USD'
});
Platform Integration Events:
If using Shopify or another supported platform, standard events are automatically configured during installation.
Advanced Matching
Enable Advanced Matching to improve tracking accuracy by sharing hashed customer data:
- Email address (automatically hashed)
- Phone number (automatically hashed)
- External ID (customer ID)
Advanced Matching helps TikTok connect more conversions to ad clicks, especially as browser privacy restrictions increase. This feature is particularly valuable when running campaigns through TikTok Ads Manager, as it improves attribution accuracy across your entire account.
Events API (Server-Side Tracking)
For maximum tracking accuracy, implement the Events API alongside the pixel. Server-side tracking:
- Isn't blocked by ad blockers
- Provides more reliable data
- Improves attribution accuracy
The Events API sends conversion data directly from your server to TikTok, bypassing browser limitations.
Testing Your Pixel
Never launch campaigns without verifying your pixel works correctly.
TikTok Pixel Helper
Install the TikTok Pixel Helper Chrome extension to verify installation:
- Install the extension from Chrome Web Store
- Visit your website
- Click the Pixel Helper icon
- Verify the pixel fires and shows your Pixel ID
Green checkmark = Pixel firing correctly Red X = Issue detected (see troubleshooting)
Test Events in Ads Manager
- Go to Assets > Events in TikTok Ads Manager
- Click your pixel name
- Navigate to Test Events
- Complete actions on your website (add to cart, purchase)
- Verify events appear in test mode
This testing workflow ensures your conversion data flows correctly into TikTok ads reporting and analytics, allowing you to make data-driven optimization decisions.
Diagnostic Tools
TikTok Ads Manager provides diagnostic information:
- Active/Inactive status: Is the pixel receiving data?
- Event overview: Which events are firing?
- Event timeline: Recent activity log
- Match quality: How well events match to TikTok users
Troubleshooting Common Issues
Pixel Not Firing
Symptoms: Pixel Helper shows no pixel detected
Solutions:
- Verify code is in <head> section, not <body>
- Check for JavaScript errors in browser console
- Confirm pixel ID matches your Ads Manager account
- Clear cache and test in incognito mode
Events Not Recording
Symptoms: Base pixel works but events don't appear
Solutions:
- Verify event code syntax (check for typos)
- Confirm event code triggers after user action, not on page load
- For platform integrations, verify app permissions
- Test with Pixel Helper active during the action
If your pixel is installed correctly but you're still experiencing issues with TikTok ads not spending, the problem may lie in your campaign setup rather than pixel configuration.
Duplicate Pixel Firing
Symptoms: Events record twice or pixel fires multiple times
Solutions:
- Check for multiple pixel installations (manual + platform)
- Remove duplicate code from theme files
- Verify GTM container only has one pixel tag per page
Low Match Rate
Symptoms: Pixel fires but few conversions attributed
Solutions:
- Enable Advanced Matching for better user identification
- Implement Events API for server-side tracking
- Ensure pixel fires on thank-you page, not during redirect
Platform-Specific Issues
Shopify:
- Disable any manual pixel code before installing TikTok channel
- Check that TikTok channel has all required permissions
WordPress/WooCommerce:
- Disable caching plugins temporarily when testing
- Verify no plugin conflicts with pixel code
The pixel is one piece of the system. For the full setup, including Events API and GA4 import, see our TikTok conversion tracking guide.
Frequently Asked Questions
How Do I Know If My TikTok Pixel Is Working?
Use the TikTok Pixel Helper Chrome extension to verify your pixel fires correctly. Visit your website with the extension active—a green checkmark indicates successful firing. Also check TikTok Ads Manager under Assets > Events to see if your pixel shows "Active" status and displays recent event data.
Can I Use the Same TikTok Pixel on Multiple Websites?
You can use one pixel across multiple websites, but it's generally better to create separate pixels for each domain. This keeps data clean and allows independent audience building. If websites share the same product catalog and customer base, a single pixel may work, but most advertisers prefer domain-specific pixels.
What'S the Difference Between TikTok Pixel and Events API?
The TikTok Pixel is browser-based JavaScript code that tracks user actions on your website. The Events API sends conversion data directly from your server to TikTok. Using both together (called "dual tracking") provides the most accurate data because server-side tracking isn't affected by ad blockers or browser privacy features.